Step 4: Setup the Automatic Serial Number Generation

At last we’ve come to the most important part – setting up of the automatic serial number generation upon request from your e-commerce provider. Basically, most of e-commerce providers allow vendors to have serial number generators on their own sites. In that case e-commerce provider just calls a vendor-specific URL and passes some parameters such as the customer’s name and e-mail as parameters.

Login to your e-commerce provider’s vendor panel and locate the custom keygen URL entry form. You can see how to configure a keygen of several popular e-commerce providers here. Now go to the products list in WebLM and locate the product that we have just created. Move mouse over it and click the “Keygen URL” link:

Some most popular e-commerce providers are hardcoded into WebLM, so you may simply copy the URL and paste it to the e-commerce provider’s form opened on the above step. Otherwise, you still should copy the URL, but you may need to adjust the template parameters so that your e-commerce provider can substitute them with the real data.

That’s all! Now you place a test order and check if a new license has been added to the list.

Step 3: Generate a Serial Number

Now we are ready to generate a serial number. For the sake of this guide we’ll do this manually. Normally, serial numbers are generated by a request of your e-commerce provider (agent). However, you may use manual generation of a serial number if you want to give a free license to some one, or provide a serial number for a product review.

Click the “Add New License” link at the left panel and you will see the new license form. Pick your product from the very first drop-down list and fill the top set of fields. Like below:

Now click the “Save” button to generate a license.

Step 2: Create a Product

The second step is to create or import a product. Product is a set of data required to generate serial numbers. You should create a new product every time you need a new type of serial numbers that are not compatible with any others. For example, if you already have a product “Word” and are about to release the advanced version “Word Pro”, you probably don’t need a new product, as they may share the same set of serial numbers. However, if you are going to release a “Photoshop” – it’s a good idea to create a new product.

Creating a New Product

Now let’s start from creating a new product from scratch. Click the “Add New Product” link at the left panel. Enter the name of the product. Leave all options with their default values for now:

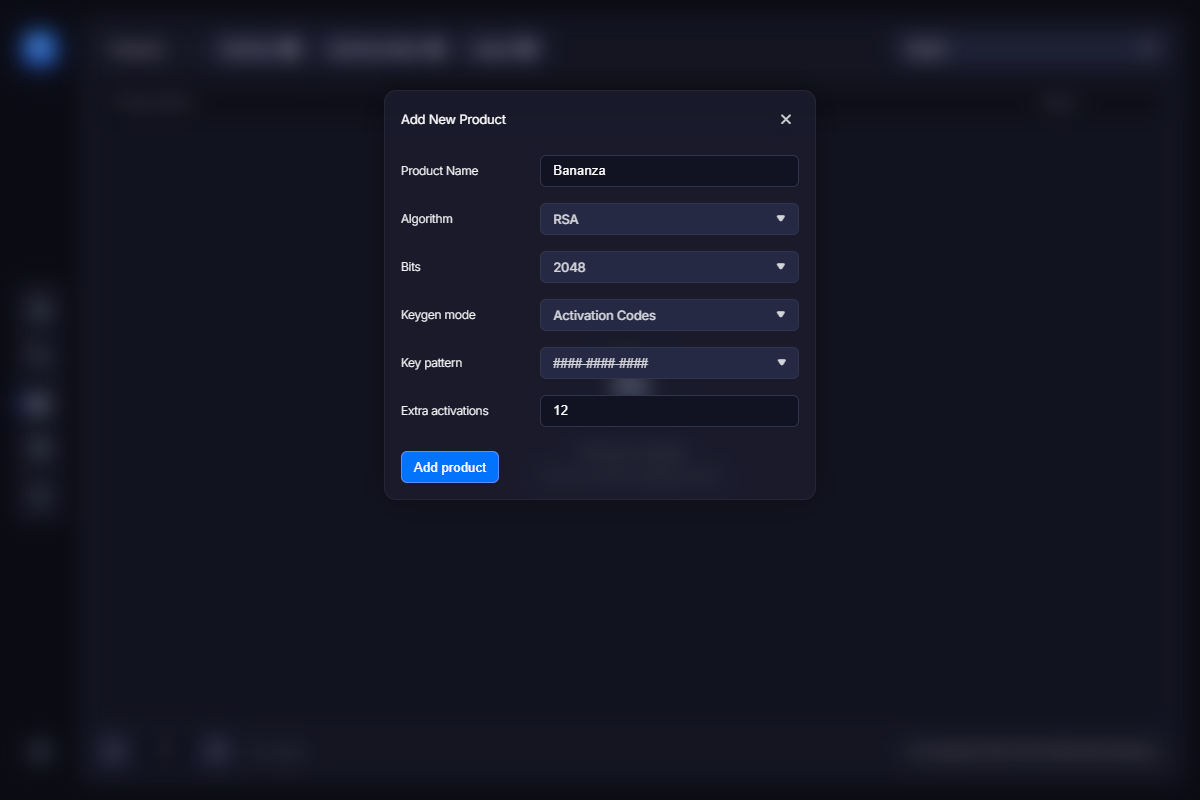
Then click the “Save” button. You should see the new product in the list. Move the mouse to that item and you’ll see the set of actions you may do. We call this a function menu. You need to export that product to use it in VMProtect. Click the “Export” link and save the VMP file to the appropriate place. Now you may use it as a separate licensing data file, keeping the protection stuff in another file. This allows you to sync the online and offline versions easily.

Importing Existing Product

Another way to add a product is to import the existing VMP file with the licensing data. Again, we suggest splitting the licensing information from the protection data in VMProtect, so you can sync the licensing data easier. Now when you have a good VMP file with the licensing data, click the “Import Project” link at the left panel.

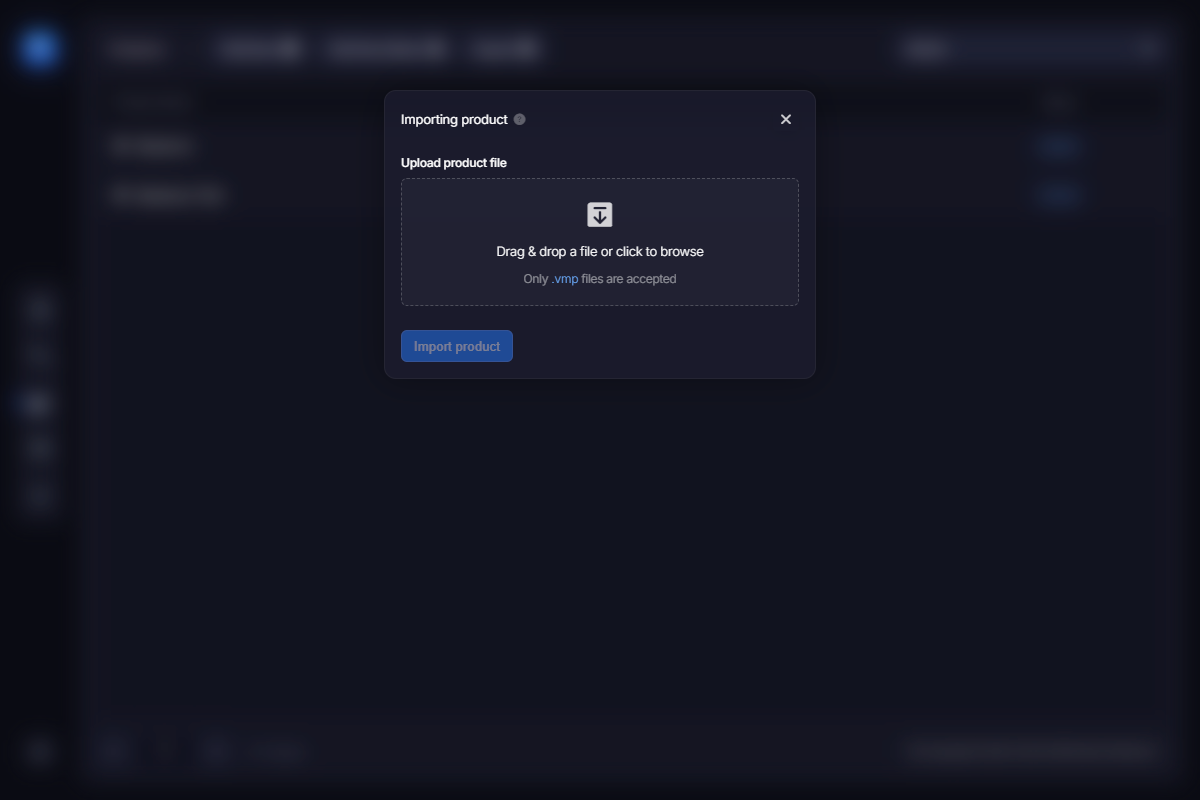
Pick the project file and click the “Import” button. After confirming the operation the product will be added to the list.

Synchronizing online and offline copies

Both methods can be used to synchronize online and offline copies of your VMP file. You should keep offline version up-to-date to be able to block compromised serial numbers. Usually you export the product and replace the local VMP file just before you build the new release. This way all blocked serial numbers become really blocked.

Once again, we really suggest to separate protection stuff from the licensing data using a separate VMP file for the licenses. If for any reason you have changed the local version of the VMP file, just import it as a new product. Web License Manager detects that and updates the online version of the project.

Step 1: Create an Agent

The first thing you need to do is to create an entry for your agent (e-commerce provider). To do this click the “Add New Agent” link at the left panel. A form shown below appears. Put the name of your e-commerce provider there and then fill in the IP range it uses.

This step is required for security reasons. Simply put, you don’t want anyone accessing your activation server, so specify one or more IP ranges here to only allow requests from those IPs. You may ask your e-commerce provider for that range or search their site for it. You should end up with something like this:

Alternatively, you can use authorization using login and a password. This section provides more info on that option.

Click the “Save” button when done. You should now see the new entry in the list.